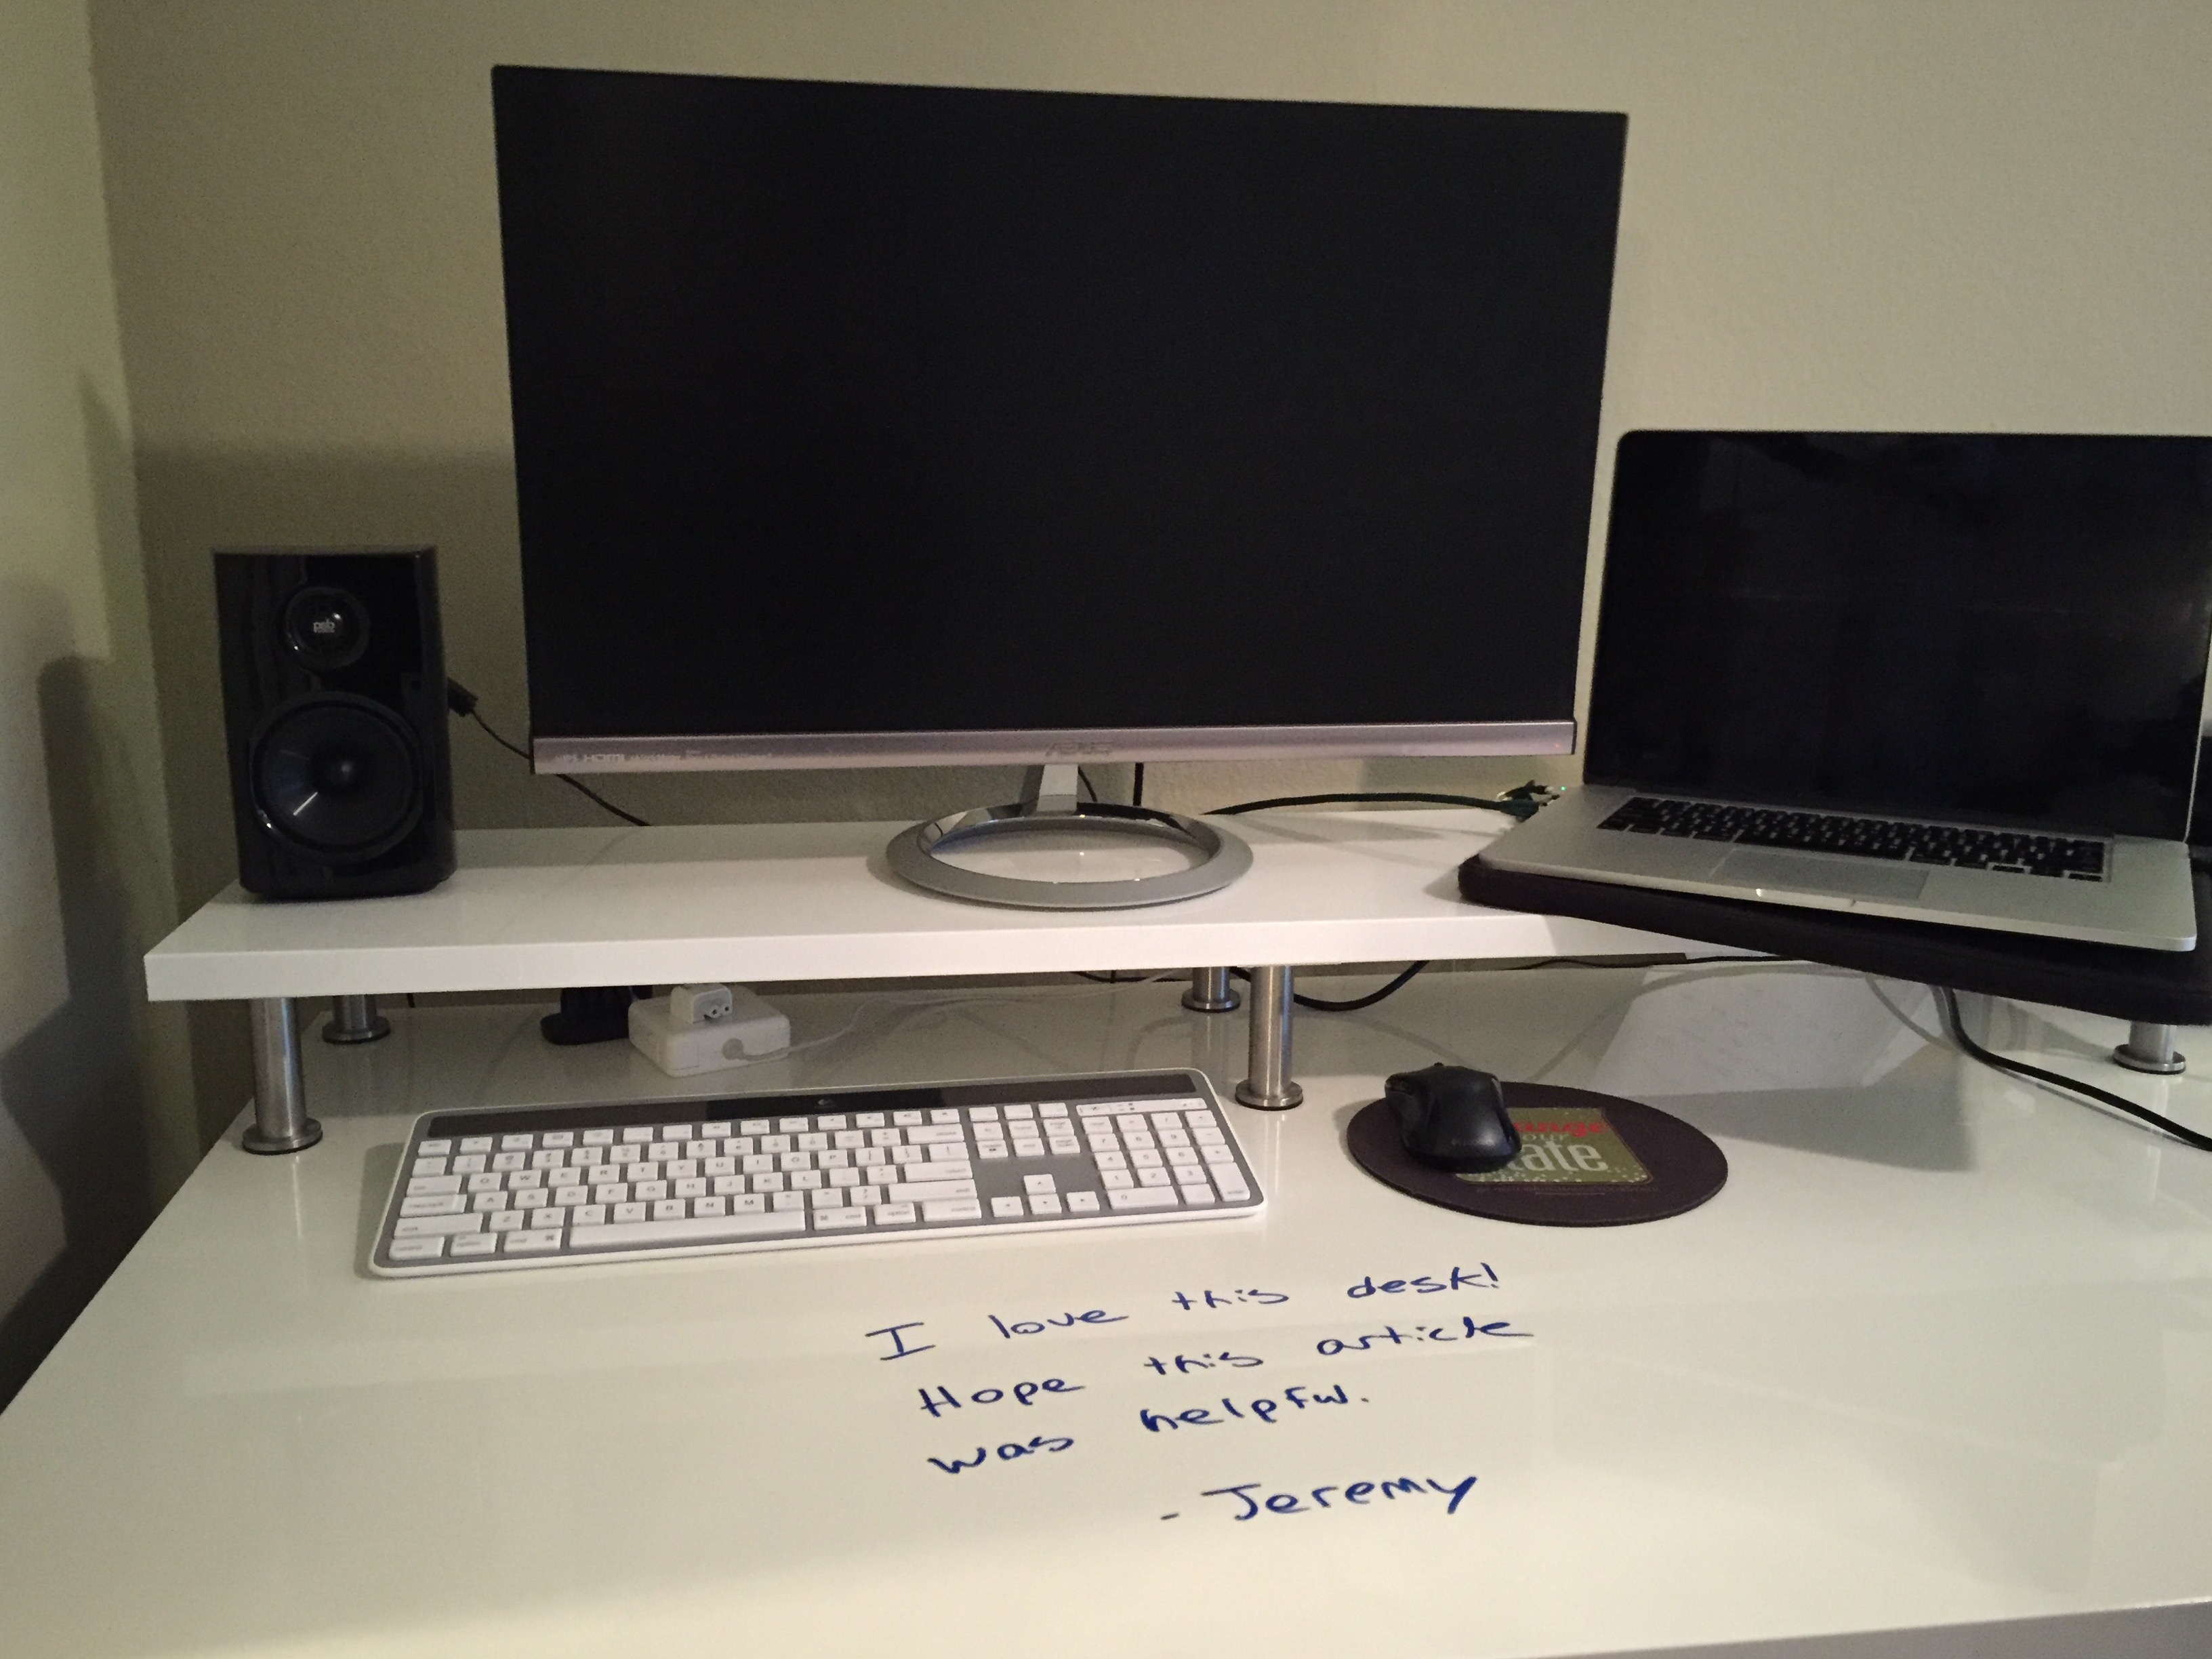
My whiteboard stand-up desk.

As a student who frequently spends long hours at my desk studying and doing homework, I often wish I could get up and move around or at least not be sitting all day. You've probably seen a number of articles detailing the negative health effects of sitting. So, this January I decided to treat myself. I put together a whiteboard stand-up desk and I love it so much I am writing this article so that you can enjoy it too! For a while, I didn't think it was feasible to purchase such a desk, seeing as many of them were thousands of dollars and after all, I'm a college student living on a budget. Upon researching my options, I found that I had three basic options: hack together a permanent standing solution for $25, purchase an adjustable standing solution (Varidesk) for $395, or purchase an actual desk that raises and lowers. Many of these are within the $600 to $1,000 range. I was leaning towards purchasing the full desk instead of the first two options because I wanted to be able to have my notes and papers at my disposal when standing, rather than only being able to elevate my computer when standing.
However, I came across StandDesk which offers an electric-powered standing desk frame for $400. No longer did I have to choose whether or not the benefits of having the entire desk raise and lower would be justified by the higher cost. Moreover, I was able to purchase just the frame, which let me put a custom top on. In searching, I also came across this article in which someone put together a stationary whiteboard desk, which I thought was pretty neat. Naturally, I decided my desktop had to be a whiteboard as well. And thus my remote-controlled, whiteboard stand-up desk was born. I gotta admit, it's pretty sweet. And I love working at it! See below to see how I put my desk together.
Update
After a few years with this desk, there's a few things I should warn you about.
- The IKEA tabletop that I recommend will not support hanging a keyboard tray under the desk as the material is not strong enough to support it.
- StandDesk customer support is absolutely terrible! The orders are slow to ship and their support team is helpless. One of their products offered free shipping on the product page but was charging me for shipping in the shopping cart. When I contacted support they said there was nothing they could do to honor the free shipping which was advertised. The customer support agent provided me with a link to complete my purchase. Because I used the link provided, the website's automated system noticed that I had an abandonded cart and offered me $30 in shipping credit to complete my order - after I had completed my order with the link provided by the unhelpful customer support agent! Oh, the painful irony.
- There are much quieter standing desk options available on the market now. I'll keep this blog post so that you can see what I did as reference, but I'd suggest you shop around for different products than what I use here.
Materials
- Whiteboard desk: $46
- Upper tier: $25
- Legs for upper tier: $14 (used 6 legs)
- Desk frame: $400
The desk frame was a breeze to assemble. StandDesk emails you a video walkthrough that is very detailed. It took maybe 15 or 20 minutes to put the desk together. I was highly impressed with the quality of the desk. You can get a good idea for how sturdy this desk is in their assembly video.
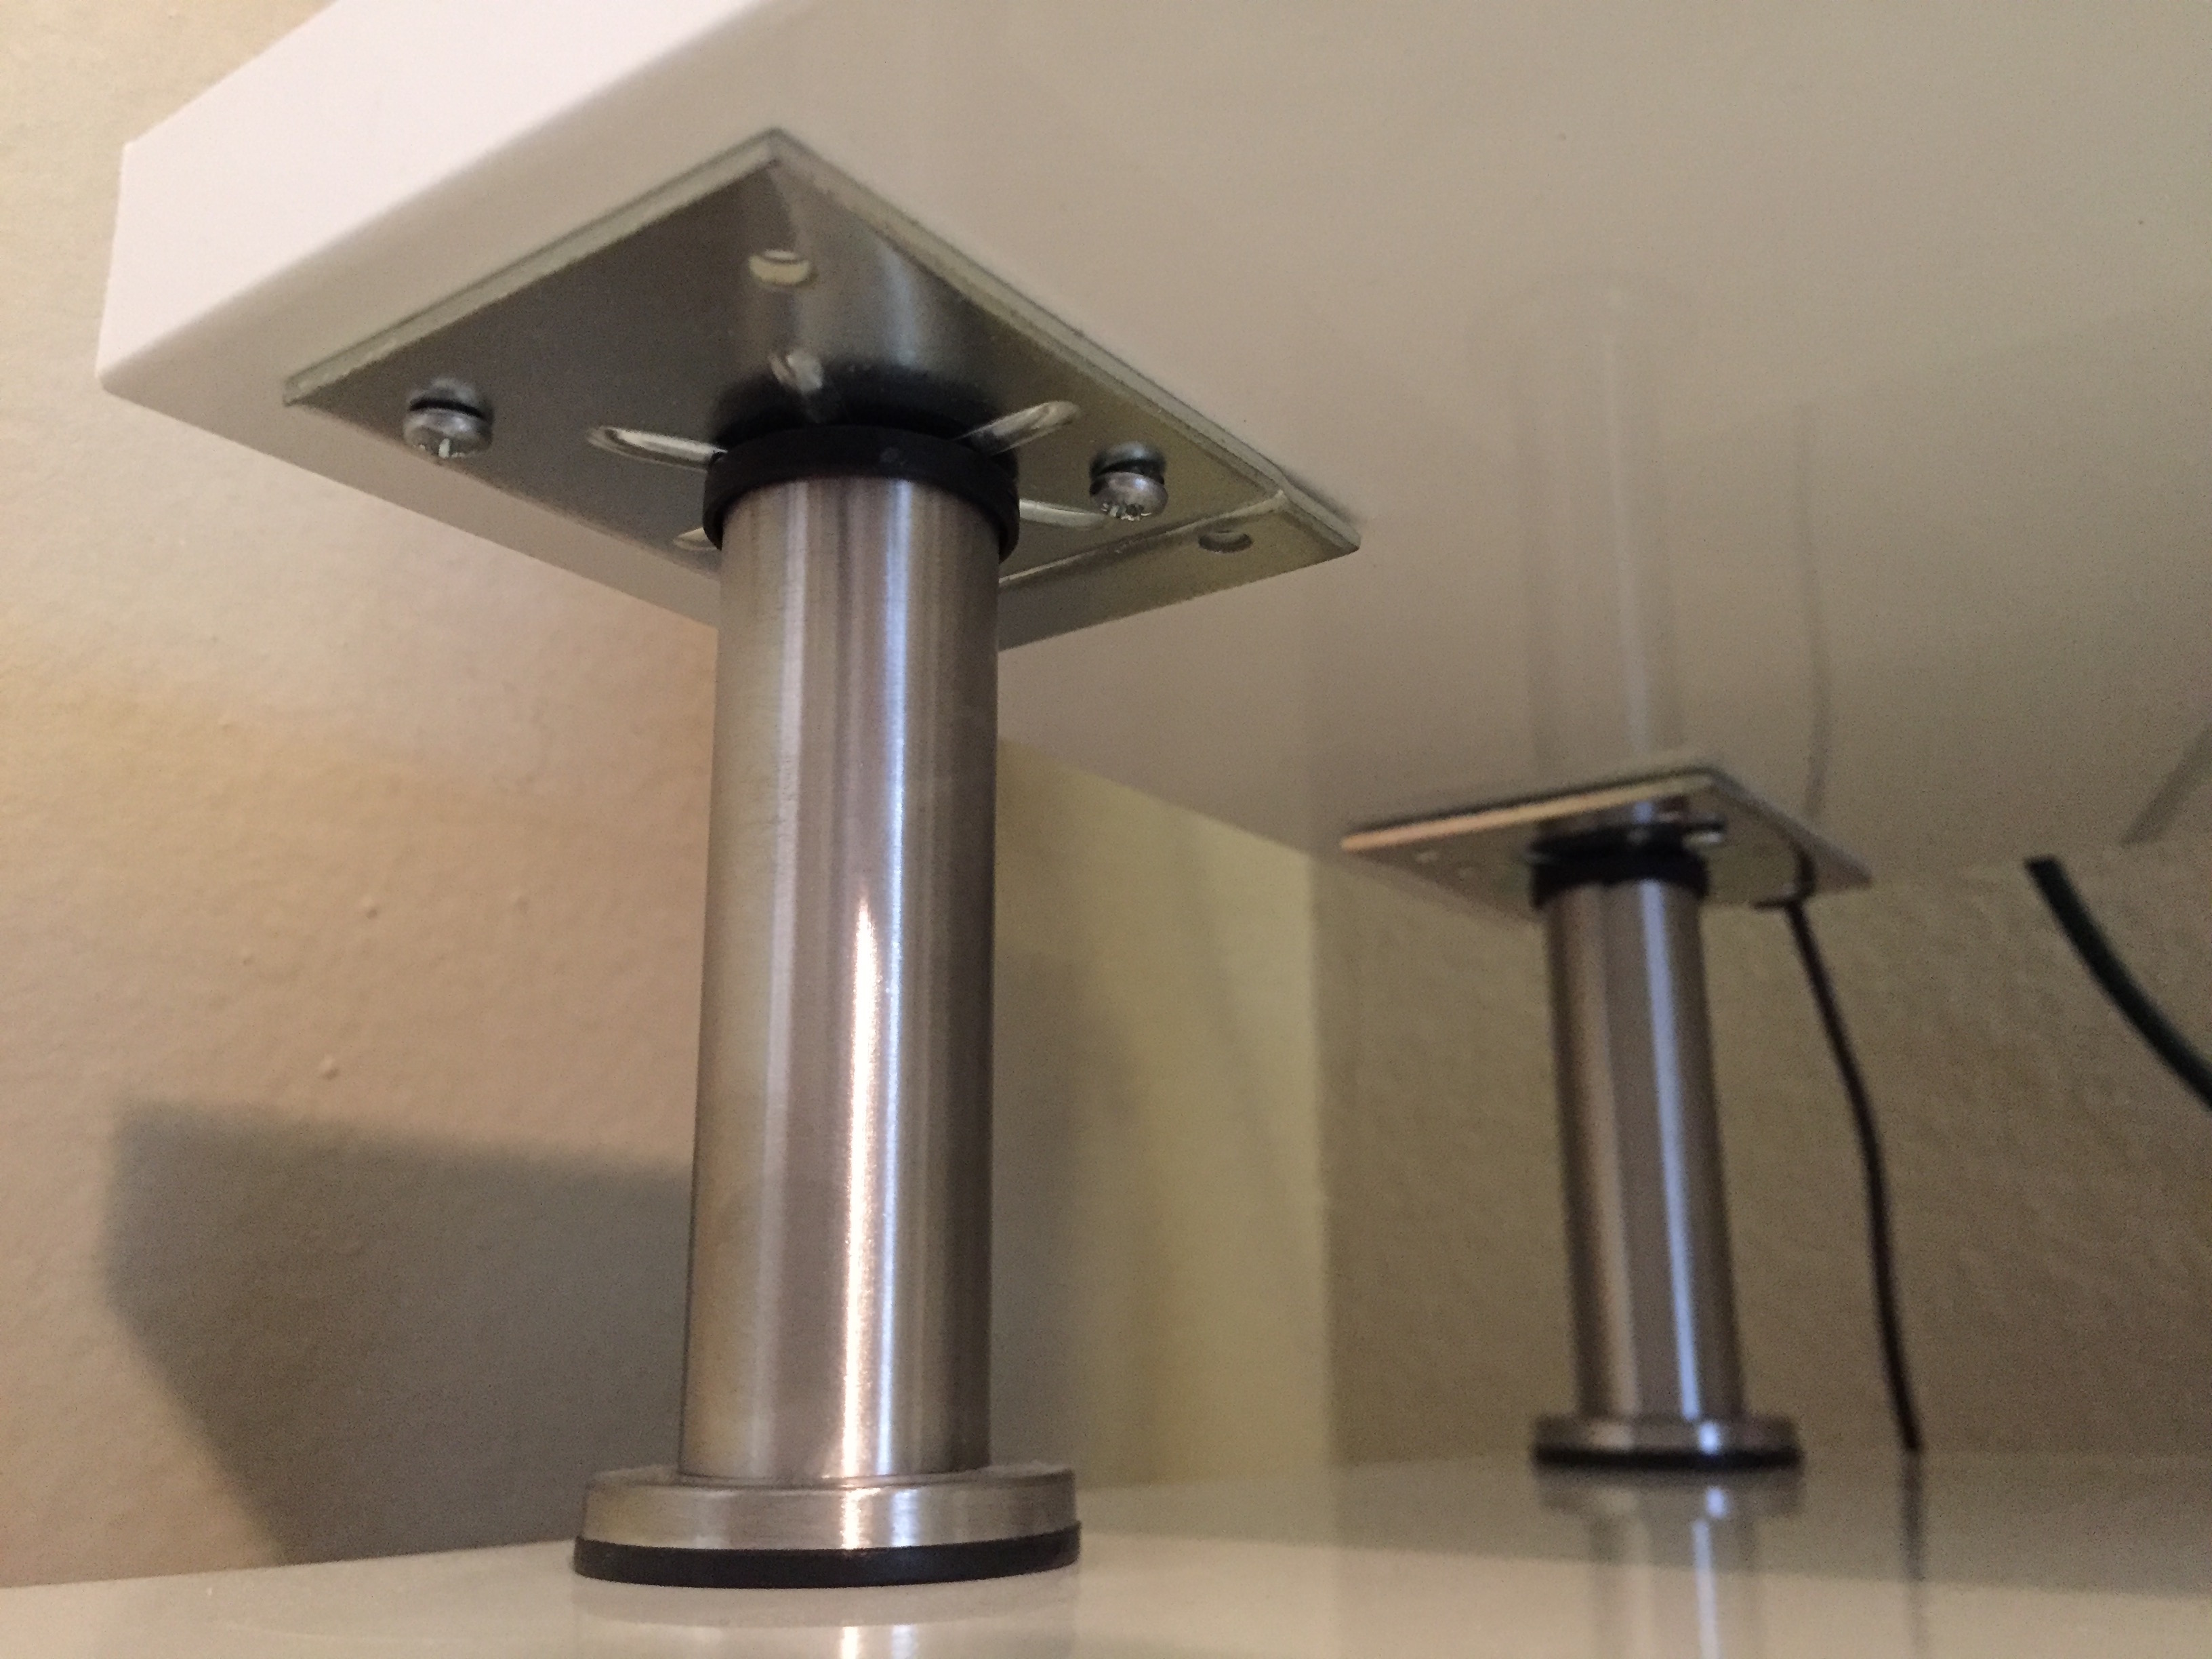
I also decided that I would like a second tier for setting my monitor and laptop on. This way, I would have more space for using the desk as a whiteboard! Check out this article for my inspiration behind the second tier. I basically just screwed the 6 legs into the shelf and that was finished. For my shelf, I positioned the brackets so that they were 1/4 inch from the front and back and 1/2 inch from the side (as pictured). I will warn you, it was a little difficult to screw into the slippery high-gloss shelf. It's possible, just proceed carefully.
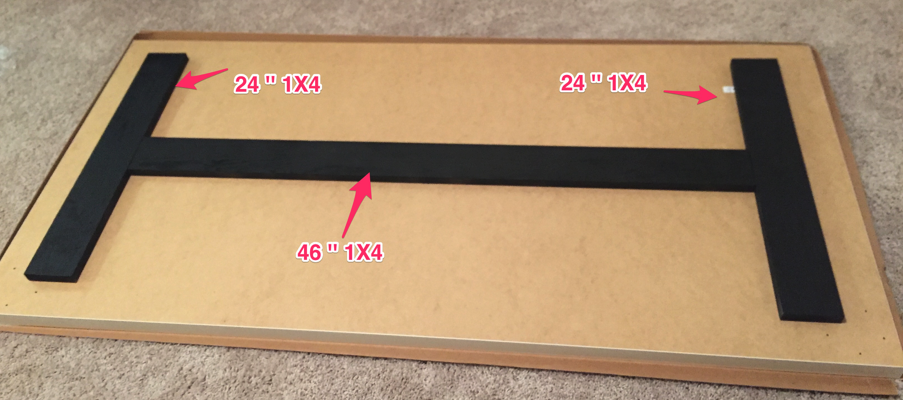
I really wanted my desktop to double as a whiteboard, so I decided to use the IKEA tabletop mentioned above. The only downside to this desktop is that it is particle-board, which isn't the best thing to screw into. On behalf of a recommendation from my grandfather, I decided to glue three pieces of wood to the bottom of the desk and attach the whiteboard to the desk frame by screwing into the wood instead of particle board. That way, if I need to disassemble the desk at any point, I will be unscrewing and re-screwing into wood rather than particle board. I attached the wood to the bottom of the tabletop using a combination of LiquidNail and particleboard screws.
The desktop screwed into the frame easily and soon enough I had my own standing whiteboard desk! I love being able to easily jot down my thoughts while working at the computer, whether I'm writing the logic sequence for a piece of code or working through homework problems, it comes in handy quite a bit! It's been about a month since I've started using it and I've had no complaints. For those wondering how easy it is to keep the whiteboard clean - markers erase easily and leave no residue behind.